The Short Answer:
Why the WordPress Plugin is Better
If you currently use WordPress to host your site, or if you use WordPress to manage your website (as your CMS)- please ensure you use the powerful EZY.ai WordPress Plugin.
So, what's the difference?
The EZY.ai WordPress Plugin allows you to fully automate changes to your website for AEO- Answer Engine Optimization. EZY will create optimized versions of your:
EZY will not only upload them to your website, but keep you notified if there are any changes to make.
The EZY.ai WordPress Plugin also allows you to automate;
- Schema upload across all of your web pages
- Meta Description upload across all of your web pages
- Blog creation and upload, every week
- FAQs creation and upload
Just through the click of a button, all of these optimization techniques can be implemented across your website, using the EZY.ai WordPress Plugin.
The EZY.ai WordPress Plugin also enhances reliability because;
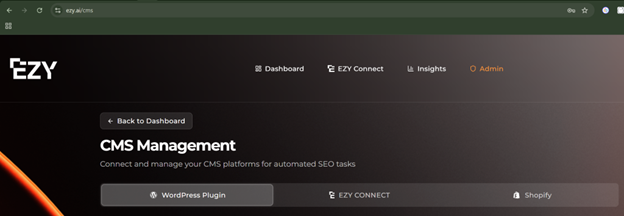
To install the WordPress Plugin;
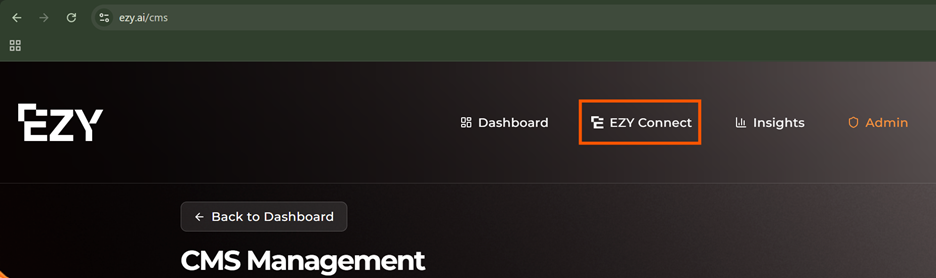
2. Click WordPress Plugin

4. Go to your website where WordPress is installed, and login to WordPress. If you are unsure of the login on your website, it's normally;
https://www.yourwebsite.com/wp-admin/
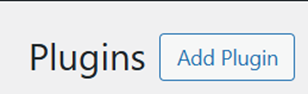
5. Click on Plugins in the WordPress left navigation bar

6. Click Add Plugin
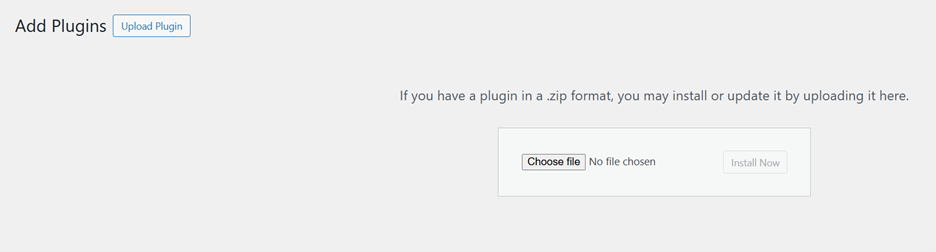
7. Click Upload Plugin and then click Choose File.
Browse to where you just downloaded the EZY Plugin to (most likely your Downloads folder) and click Install now
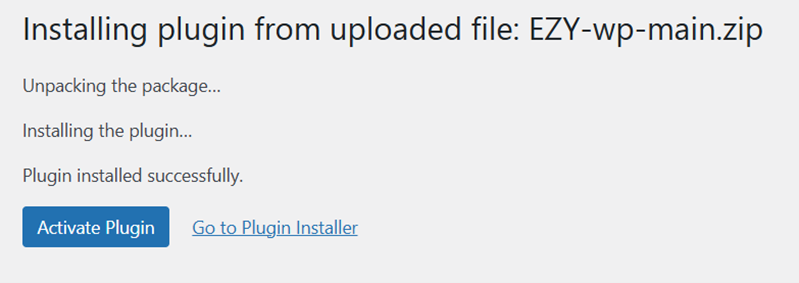
8. Click Activate Plugin
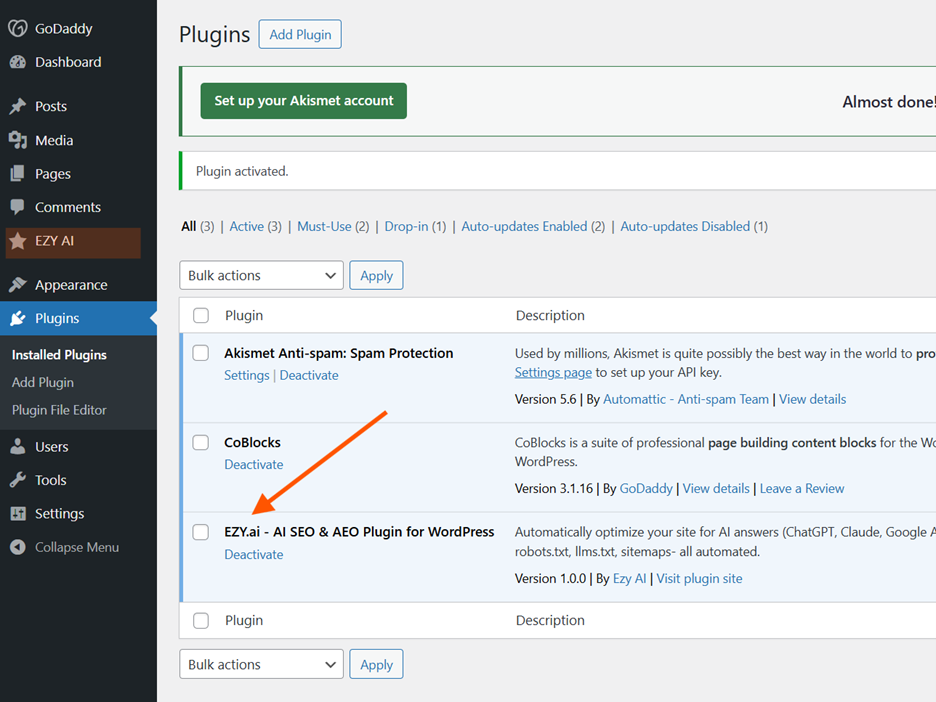
9. You should now see EZY AI in the left navigation bar, and EZY.ai listed with your other WordPress plugins.
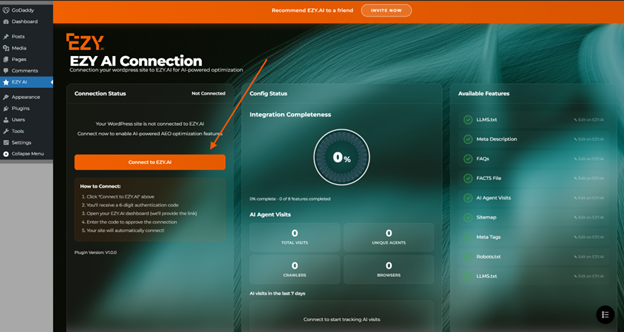
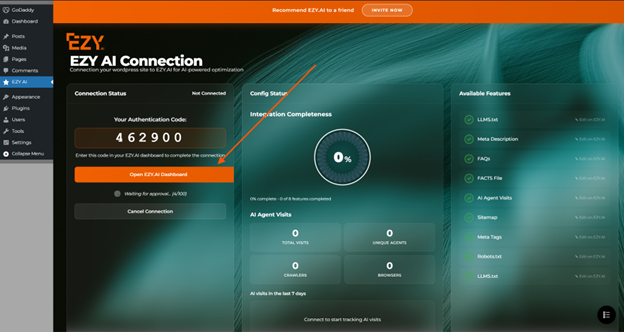
12. Click Connect Site. If you have more than one domain with EZY, please select the domain you are connecting to WordPress and click Connect Site
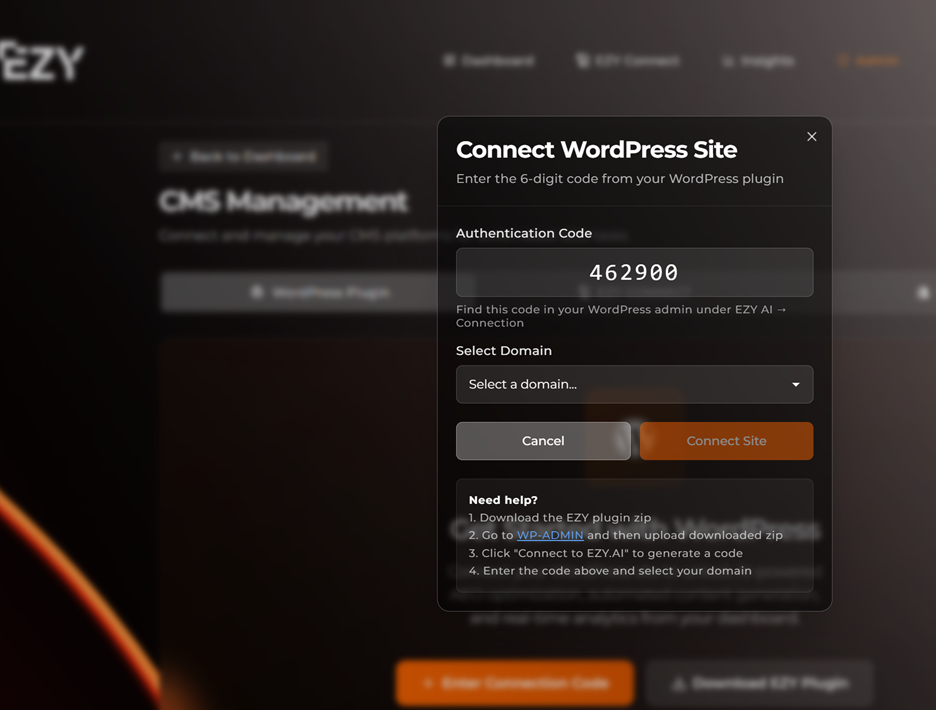
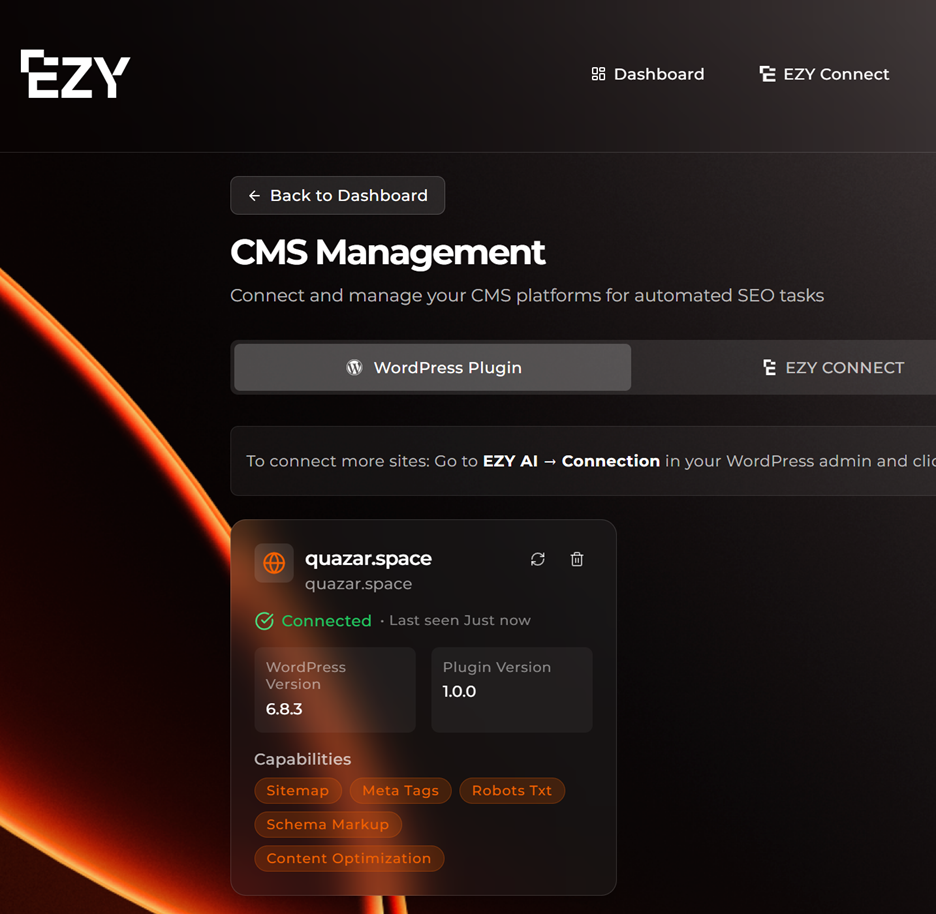
WordPress will now show up as a Connection in the EZY.ai CMS Management panel.
Success! 🎉 You are now connected. You will see your site listed as "Connected" in the CMS Management panel. Throughout EZY, you will now see yellow "Upload to WordPress" buttons that let you push changes instantly.
If you do not use WordPress, then please use EZY Connect instead.
The EZY Connect does not automatically update your files and settings, so you need to download your EZY Widget data and either;
- Upload the route files yourself
- Send to your web developer
- Ask Lovable to upload the files (if you use Lovable).